Today, I write about how to make miniature planter and plant,
and simple explanation of copy by silicon rubber.
Well, I already have opened about how to making model and copy
in my website. But those are in Japanese.
And I was requested that translation to English,
And I was requested that translation to English,
but I had lost the opportunity. (I'm sorry!)
So, I decided write new tutorial in strange English.
The planter size is about 1.5cm X 1.5cm.
The planter size is about 1.5cm X 1.5cm.
OK! Here we go!
First, make one board (thick about 1.5mm) and two half balls by stone clay.
One ball is a spare that a case of if failed.
Next, cut half the half ball (become quarter), draw some lines on this, and carve with a cutter, sandpaper and sand sponge etc.
These are my tools, design cutter and sand sponge. The sand sponge is very useful!
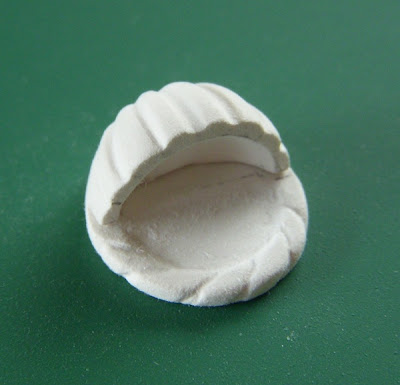
Make a part of back of planter. Draw your favorite design. I made a image of basket.
Draw lines and carve to the part of handle.
Dig shallow to the inside planter. It's not need deep, because the plant not plant to the interior.
After dug. And put a planter on back (handle).
Coat with foundation paint gray (surfacer). When put gray on this mold, it can find the strange part in detailed. If found some trouble, correct or adjustment.
And the weak point of stone clay is fluffy in the face. So, file smooth by sand sponge. And coat with the surfacer again. The face will be smooth.
Next step is take a silicon rubber mold. Work such like this photo, and coat with separated compound, and the silicon rubber pour in this box slowly, little by little and like a thread. Never pour a lot of silicon at once, it can not take detail mold.
It have made perfect silicon rubber mold. :D Coat with separated compound (for take out easily), and pour urethan resin in this mold.
The copy done. Adjust shape by sandpaper etc.
If you'd like to put on the wall, hole by router or drill etc.
How to make the texture like a terra cotta:
After coated with surfacer, put color by brush, after dry, put color by sponge, each about 2 times.
Well... I forgot take a photo that making plant. :,-(
I explain in the simple drawing.
This time, almost photos became bigger in one click. (Only last one is not bigger.) You could see more detail. Of course, there are a lot of way in the world. This is a part of a lot of way. I guess some people may already have done this work. And, this way can apply to make your favorite shape of dish, cup or frame etc. I hope today's post is helpful for your works.
Thank you for reading long, long blog. :D And... if there are some not clear meaning sentence, please point out. I already had confused halfway. (@_@)


14 comments:
Muchisimas gracias por el tutorial, la planta te quedo fantastica!!
besitos ascension
Thanks so much for the tutorial..it is very interesting.
I'll try!
Hugs
Sonya
Thanks for the fab tutorial, I have to try that molding thing at some point :)
thank you for all the hard work in making this tutorial! it is always interesting to view how your mind works ^ ^ i hope to try too some day!
Thank you for the excellent tutorial! You have done a very good job of explaining the directions.
That is so cool of a tutorial! Thank you for posting it for all of us who are not familiar with casting and molding. It is very helpful!
I always like your tutorials. They are always very clear. Thank you for your work :)
It is an excellent tutorial for making molds with silicone rubber.
Thank you very much for sharing it with your followers!
Hugs,
Hi. Thanks for letting us have this tutorial. I've got to try this some day.
Hugs from Denmark
Lene
What a beautiful planter. Thank you so much for this wonderful tutorial. I definitely want to make one for my new flower shop! Carol x
that is beautiful! looks so easy when you see the step by step pics but Im sure it takes a lot of skill!
Everyone thank you very much! Todas muchisimas gracias! :-))))
I always have used Japanese materials, resin clay (air dry clay) and stone clay. I guess almost people have used Fimo except Japanese miniature maker, and I guess that it possible to make the model by Fimo. I heard Fimo get hard after heating. So, it making shape to model before heating.
But... this is not sure, my guess. Because I haven't used Fimo yet. I try to use Fimo someday.
yay! thank you for sharing this!
This is a wonderful tutorial -- clear and useful! Thank you!
Post a Comment